Types of Wood Joints in Traditional Joinery Explained
By Daniel Fitzpatrick, Master Craftsman · Guild of Master Craftsmen
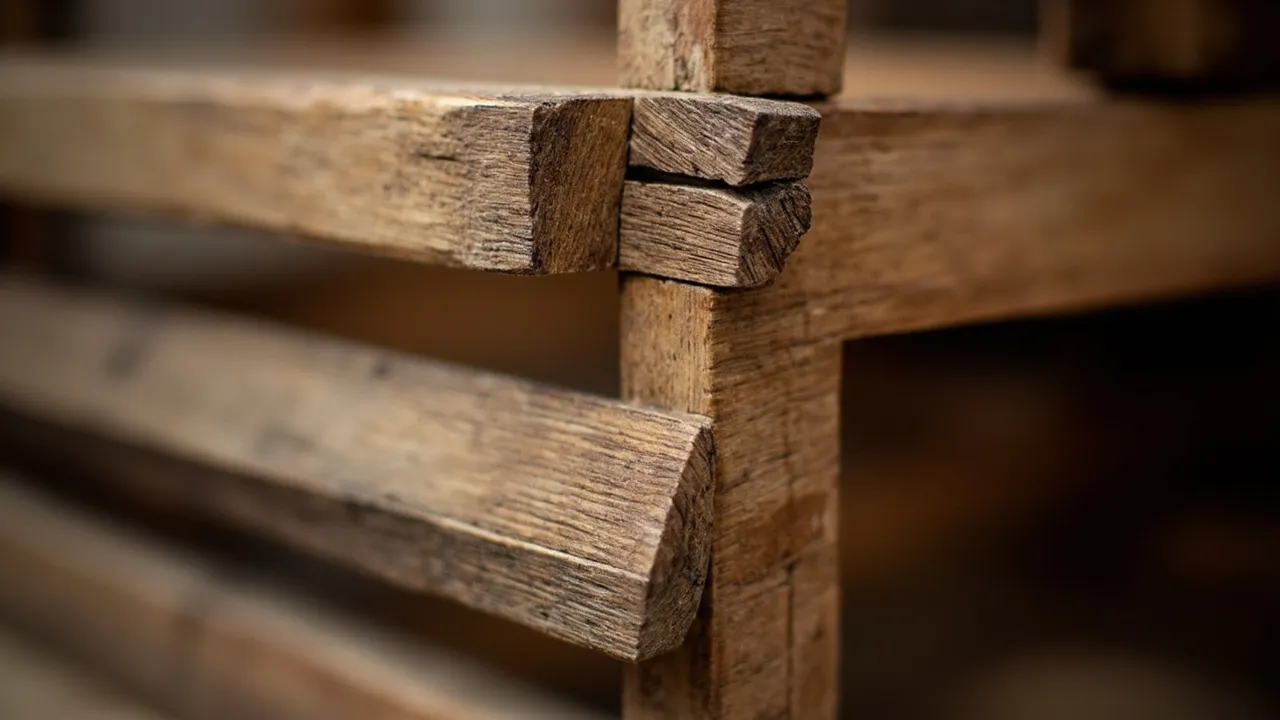
Types of wood joints in traditional joinery include the mortise and tenon, dovetail, scarf, housing, bridle and tongue and groove. Each suits a different job: framing corners, resisting pull, lengthening timber, carrying shelves or treads, and joining boards edge to edge.
Most period windows, doors and staircases are held together by a handful of joints. At our workshop at Crossley Mills in Honley, we take apart, repair and remake these joints on old houses across Yorkshire. This guide explains the main types of wood joints, what each one does, and exactly where you will find it in a sash window, a panelled door and a staircase.
Key takeaways
- A small set of joints does most of the work in traditional joinery: mortise and tenon, dovetail, scarf, housing, bridle and tongue and groove.
- The mortise and tenon joint holds the corners of most traditional sashes and panelled doors. The dovetail joint resists being pulled apart. The scarf joint lengthens or repairs timber end to end.
- Panels in period doors are left to float in grooves so the timber can move with the seasons.
- When we repair old joinery, we match the original joint rather than replacing it with screws or brackets.
What are the main types of wood joints?
Joinery is the part of woodworking that joins pieces of timber to make more complex items. Wikipedia's article on joinery notes that some joints use fasteners or adhesives, while others use only wood, such as dowels or plain mortise and tenon fittings. It also points out that the right joint depends on the materials and the purpose, which is why the joints used to build a house can differ from those used in cabinet work (Wikipedia, Joinery).
These are the types of wood joints we cut most often at the bench:
| Joint | What it does | Where you find it in a period house |
|---|---|---|
| Mortise and tenon | Joins two pieces, usually at right angles, with a tongue fitted into a hole | Sash corners, door rails and stiles, glazing bars, newel posts |
| Dovetail | Interlocking pins and tails that resist being pulled apart | Sash meeting rails, drawers, some balusters and stair parts |
| Scarf | Joins two pieces end to end with long tapered faces | Long handrails, repairs to cills, rails and stiles |
| Housing | A trench cut across the grain that takes the end of another piece | Stair treads and risers in the strings, shelves, box frame parts |
| Bridle | An open mortise, with the tenon visible on the end | Simpler frames and less formal work |
| Tongue and groove | Boards joined edge to edge | Floorboards, panelling, boarded doors, some stair treads and risers |
What is a mortise and tenon joint?
A mortise and tenon joint has two parts: the mortise, a square or rectangular hole, and the tenon, a tongue cut on the end of the other piece to fit it exactly. Wikipedia describes it as a joint that woodworkers around the world have used for thousands of years, mainly where pieces meet at right angles. The tenon usually has shoulders that seat against the face of the mortised piece, and the joint may be glued, pinned or wedged to lock it (Wikipedia, Mortise and tenon).
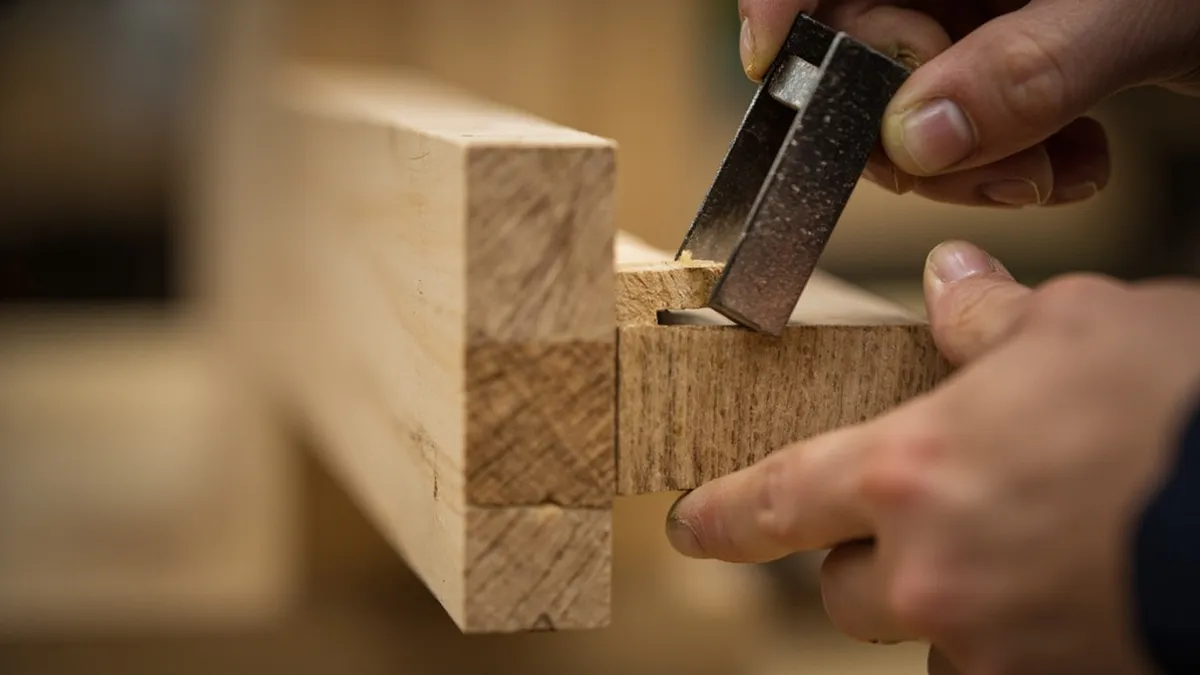
There are several variations that matter in old joinery:
- Through tenon. The tenon passes right through the piece and shows on the far side. This is the usual joint at the corners of a sash and between door rails and stiles.
- Stub tenon. A shorter tenon that stops inside the timber, so it does not show.
- Pegged tenon. A peg is driven through the side of the mortise and the tenon. Wikipedia notes this is common in timber framing.
- Haunched tenon. Wikipedia's article describes the haunch as the cut-away part of a sash corner joint that stops the tenon coming loose.
The same article says it is good practice to make the tenon about one third the thickness of the rail, and says the joint is difficult to make because it needs precise measuring and tight cutting.
What is a dovetail joint?
A dovetail joint is a set of trapezoidal pins on one board that interlock with matching tails on another. Wikipedia notes that it is known for its resistance to being pulled apart, and that once glued it needs no mechanical fasteners. The slope of the tails is typically 1:6 for softwoods and a shallower 1:8 for hardwoods (Wikipedia, Dovetail joint).
The main dovetail types are:
- Through dovetail: end grain shows on both faces. Common in boxes and carcasses.
- Half-blind dovetail: hidden from the front. Commonly used to join drawer fronts to drawer sides.
- Secret mitred dovetail: completely hidden from both outside faces. Wikipedia says it is used in the highest class of cabinet and box work.
- Sliding dovetail: a tail slid into a socket across the face of a board, used for joining shelves and cabinet parts.
Wikipedia also notes that the dovetail design is an important way to tell apart different periods of furniture. We see this in our bench joinery and furniture work: the shape and spacing of hand-cut dovetails can help date a piece.
What is a scarf joint?
A scarf joint joins two pieces of timber end to end. Wikipedia explains that it is used when timber is not available in the length needed, and that joiners often favour it because it leaves a barely visible glue line. The ends are cut with opposing tapers, generally at an angle between 1:8 and 1:10, which gives a long grain-to-grain gluing surface and a stronger joint than a simple butt joint (Wikipedia, Scarf joint).
There are plain scarfs, which rely on glue or fixings, and interlocking scarfs, which give more strength. For us, the scarf is the joint behind most timber repairs. When the bottom of a door stile or the end of a cill has rotted, we cut out the bad wood and scarf in new timber, so the rest of the original piece stays.
Where are the joints in a sash window?
A box sash window uses most of the joints on this list. Here is what we usually find:
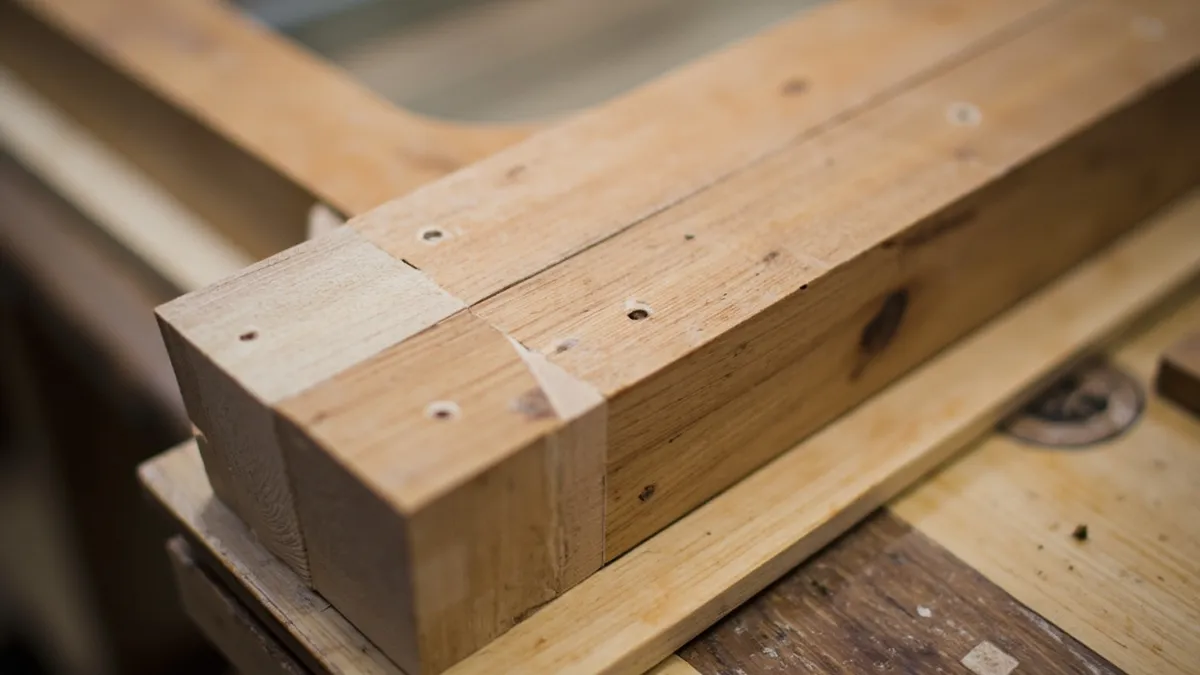
- Sash corners: through mortise and tenon joints, often haunched and wedged, where the stiles meet the top and bottom rails.
- Meeting rails: on many sashes the meeting rail is dovetailed into the stiles, because the rail is slim and a dovetail resists being pulled apart. The horns seen on many Victorian sashes sit here, beyond the joint.
- Glazing bars: small mortise and tenon joints, with the mouldings scribed or mitred where bars cross.
- Box frame: the pulley stiles are usually housed into the head and the cill, and the beads sit in grooves or are pinned on.
Loose corner joints are one of the most common sash faults we repair. Our sash window restoration work often starts with knocking a corner apart, cleaning out the old glue and paint, and re-wedging the tenon.
Where are the joints in a panelled door?
A panelled door is a frame and panel. Wikipedia explains that the upright members of the frame are called stiles and the horizontal members rails, with muntins added between sections when a large panel is divided. The panel is usually not glued, but left to float in a groove so seasonal movement does not distort the frame. Frames can be made several ways, but Wikipedia notes that mortise and tenon is the strongest and is often used for large doors (Wikipedia, Frame and panel).
In a Georgian or Victorian four- or six-panel door, that means:
- Top, middle and bottom rails tenoned through the stiles and wedged from the edge.
- Muntins tenoned into the rails between the panels.
- Panels sitting loose in grooves cut in the inner edges of the frame.
- Mouldings either cut on the frame itself or planted on and pinned.
A sagging door or split panel often means a loose wedge or a panel painted or glued solid. Our door restoration service deals with both.
Where are the joints in a staircase?
A traditional timber staircase relies mainly on housing joints. The treads and risers sit in tapered housings cut into the wall string and the outer string, and are held tight with glued wedges driven from underneath. The riser and tread are often joined to each other with a tongue and groove, and glue blocks behind stop them creaking.
Elsewhere on the stair you will find:
- Newel posts: joined to the strings and the handrail with mortise and tenon joints, often pinned.
- Balusters: on cut-string stairs the feet are often dovetailed or housed into the end of the tread, with the top tenoned or housed into the handrail.
- Handrails: long runs and curved sections are joined end to end, which is where scarf joints and concealed handrail bolts come in.
A creaking stair often means wedges or glue blocks have come loose. Our staircase and spindle restoration work includes re-wedging treads and turning replacement balusters to match.
Which joints are the hardest and easiest to make?
What is the hardest joint in carpentry?
There is no single answer, but the dovetail is a common answer. Wikipedia describes the dovetail as a difficult joint to make by hand that needs skilled workmanship, and the secret mitred dovetail as the one used in the highest class of work. In period joinery, we would add wreathed handrails on curved stairs and the scribed glazing bars of a Georgian sash.
What are the easiest wood joints to join?
The simplest types of wood joints are the butt joint and the lap joint. They are quick but weak: Wikipedia's frame and panel article notes that butt joints are only used on very small assemblies. Housings, bridles and stub tenons are the next step up.
Why do joints fail in old Yorkshire houses?
Wood moves. Wikipedia's joinery article explains that timber behaves differently along and across the grain, and that joints which ignore this are likely to fail (Wikipedia, Joinery). Here in Yorkshire, the wet, exposed Pennine weather of the Colne and Holme valleys means external joinery is soaked and dried many times a year. In the stone-built Victorian terraces around Huddersfield and the long rows of mullioned windows in the weavers' cottages around Holmfirth, Honley and Marsden, we see the same pattern: paint cracks at a joint, water gets into the end grain, the tenon swells and shrinks, and the joint works loose.
Our rule of thumb: repair the joint, not around it
Our workshop rule is simple: we repair the original joint in the original way. If a sash corner is loose, we take it apart and re-wedge it rather than adding a metal bracket. If the end of a stile has rotted, we scarf in new timber rather than filling it. We recommend this because the old joint was designed to move with the timber, while screws and plates hold one spot rigid and can split the wood around them.
Before any repair, we check:
- Is the joint loose, or is the timber around it decayed?
- Can it be knocked apart without breaking the tenon or the pins?
- Is enough sound timber left to re-wedge or re-pin it?
- Does the new timber match the species and grain direction of the old?
- For listed buildings, is the repair like for like? Check with your local planning authority or conservation officer before starting.
This is the everyday work of traditional bench joinery: making new parts and repairing old ones using the same types of wood joints the original joiner used.
Need a joint repaired or a part made to match?
If you have a loose sash corner, a sagging panelled door or a creaking stair, we can tell you what the joint needs. Master craftsman Daniel Fitzpatrick, a Guild of Master Craftsmen member with over 30 years at the bench, oversees every job himself, and advice is free.
Call 01484 666 333, get in touch through our contact page, or read more about our bench joinery service. We work from Crossley Mills in Honley and cover Holmfirth, Huddersfield and towns across West and North Yorkshire, as far as Harrogate and York.
Frequently asked questions
What are the 9 essential woodworking joints?
Lists vary, but a typical one includes the butt, lap, mitre, housing, tongue and groove, bridle, mortise and tenon, dovetail and scarf joints. In traditional window, door and staircase work, the mortise and tenon, dovetail, housing and scarf do most of the structural work, while the others are used for boards, trims and simpler frames.
What are the 10 basic types of wood joints?
A common list of ten basic types of wood joints adds the dowel joint to the nine above: butt, lap, mitre, housing, tongue and groove, bridle, mortise and tenon, dovetail, scarf and dowel. Each suits a different job, from joining boards edge to edge to framing the corners of a sash or door.
What is the strongest wood joint for a door frame?
For a panelled door, a through mortise and tenon, wedged and glued, is the traditional choice. Wikipedia's frame and panel article describes mortise and tenon as the strongest frame method and says it is often used for large doors. Period doors built this way can be taken apart and repaired again and again.
Can loose joints in old windows be repaired?
Usually, yes. A loose sash or door joint can often be knocked apart, cleaned of old glue and paint, and re-wedged or re-pinned. If the timber around the joint has rotted, the decayed section can be cut out and a new piece scarfed in, keeping the rest of the original frame.